Free Software Development Online Courses with Certificates by AWS Experts

Originally posted on November 16, 2023 @ 12:12 am


Software developer

If you are a beginner looking for a clear starting point to help you build a career or learn how to build AWS Cloud applications and become a certify software developer, we recommend you start with an AWS Learning Plan. In the world today, only passionate individual regularly explore new tools, frameworks, and best practices to enhance their digital skills. Here is a great opportunity for your to be enlisted into software developing or be upgraded

This set of on-demand courses will help grow your digital skills as you learn about cloud developer and serverless fundamentals, containers, and more. Learning Plans can also help prepare you for the AWS Certified Developer – Associate certification exam.

Learn step-by-step with the AWS Developer Learning Plan

AWS Learning Plans offer a suggested set of digital courses designed to give beginners a clear path to learn. The AWS Developer Learning Plan eliminates the guesswork

You will be guided through a recommended curriculum built by AWS experts that you can take at your own pace. Complete the full plan, or choose the courses that interest you. After you complete this plan, you’ll be better able to develop, deploy, and modernize applications on AWS.

You will have gained skills to enter careers as a software developer or DevOps engineer. You will also have a better understanding of AWS services like AWS Lambda and more

AWS Technical Essentials

Successful completion of this course may also serve as a foundation for more advanced AWS training and certification paths, such as those for solutions architects, developers, and sysops administrators.

However, are you looking to solve an immediate technical or business problem? Do you want to sample an AWS Training before starting a full learning plan? Or do you want to customize your learning journey?

Explore all our digital trainings for courses relevant to all skill levels. Watch our most popular trainings below, or browse our full selection to find one that interests you.

Browse individual on-demand AWS courses

Coding Engineers

1. Getting Started with .NET on AWS
.NET which is a software development framework developed by Microsoft that supports building and running applications for various platforms, including Windows, macOS, and Linux.

It is important to understand the core concepts and features of the .NET framework, including the Common Language Runtime (CLR), the Base Class Library (BCL), and the application deployment model.

2. Introduction to Serverless Development
Serverless development is a powerful paradigm with an approach to building and deploying applications without the need to manage server infrastructure.

The cloud provider automatically handles the administration, maintenance and scaling, of servers, thereby allowing developers to focus solely on writing code.

3. AWS Cloud Practitioner Essentials
This will help you have good foundational knowledge and understanding of cloud computing concepts and practices.

Some examples of major cloud providers are Amazon Web Services (AWS), Microsoft Azure, Google Cloud Platform (GCP)

It is role is often associated with entry-level positions or individuals who are exploring cloud technologies for the first time.

4. Data Analytics Fundamentals
With Data Analytics for beginners, you are expose to the easy guide to collating, examining, cleaning, transforming, and modeling data to discover useful information, draw conclusions, and support real world decision-making

5. AWS Compute Services Overview
It will helps you to have overview of Virtual machines with scalable compute resources that allow users to run applications in isolated environments. Users have control over the operating system, configurations, and software installations.

AWS Certified Developer – Associate (Digital)

AWS certifications are valid for three years. To maintain your certification, you can either take the latest version of the exam or demonstrate continued expertise through qualifying professional experience.
WordPress To BlogEngine.Net – 5 Possible Stages

Originally posted on February 9, 2025 @ 5:12 pm

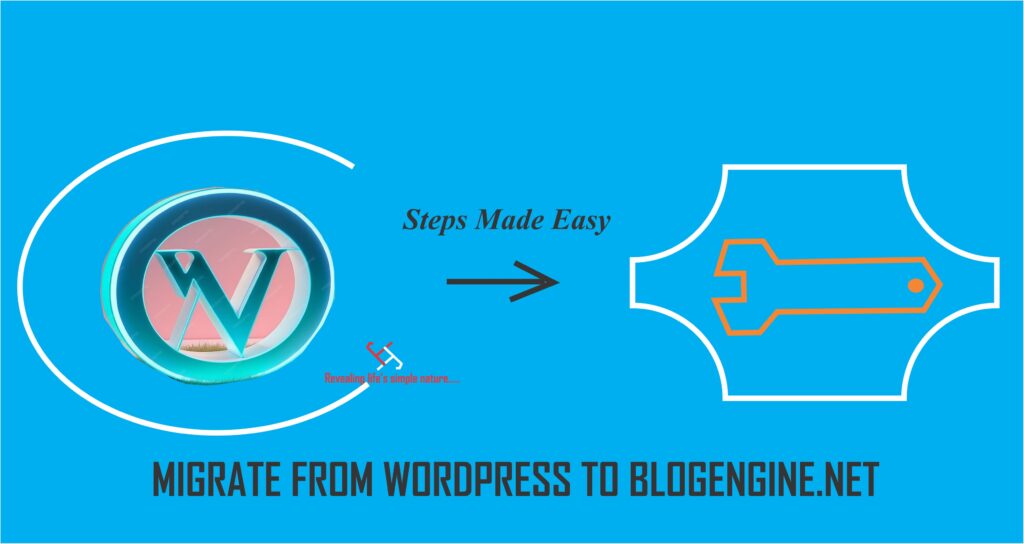
It helps portray pictorial  migration from WordPress to BlogEngine

Introduction

Migrating from WordPress to BlogEngine.NET involves transferring website content from the WordPress CMS which is PHP and MySQL-based to BlogEngine.NET which runs on ASP.NET and SQL Server/XML storage.

WordPress

It is a platform that creates, manage, help to suggest hosting services and allow its platform users to publish web-page(s) with the use of Internet Service Providers.

WordPress is the most popular website building platform that requires no programming (coding) skills as it is designed with pre-loaded templates which is editable/adjustable to the taste you so desire it.

Although, WordPress as a content management system is of great value to anyone with coding or and graphics design skill.

The Uniqueness of WordPress

Amongst other website building platforms, WordPress is likely to be preferred to other platforms with some of the reasons as listed below;

  1. It has a responsive design layout
  2. It is highly flexible with free and open source
  3. It is great pick for beginner of website designers

WordPress has two categories of website namely;

  1. wordpress.org; is a self-hosted web-page where you personally engage the services of a hosting provider like namecheap.com, godaddy.com etc.
  2. wordpress.com – Already hosted site which is managed by WordPress

BlogEngine.NET

This is an ASP.NET based platform that helps to create and manage blogs that mainly operates on Microsoft .NET framework.

BlogEngine.NET is not user friendly to developers of blogs but requires an adequate knowledge in .NET

However, BlogEngine.NET has built-in theme with its appearance modification

BlogEngine.NET has its unique features that is desired by developers and thereby make it their choice for building a website blog

  1. Comes with built-in SEO tools to optimize blog visibility
  2. The resources used from other website building platform is higher than BlogEngine.NET, thus it is preferred.
  3. Some developers like to engage the ASP.NET based solution
  4. It is free and open source web blog building platform

2 Core Relationship of WordPress and BlogEngine.Net Platforms

  1. Window Server – WordPress can be installed using PHP Manager but BlogEngine.NET runs natively.

The best option for the dual hosting is a Windows Server with IIS and PHP support.

  1. Database – BlogEngine.NET uses XML or SQL Server while WordPress uses MySQL server with no default MySQL support

This did not stop their relationship as they can share the same SQL server database with different table prefixes to prevent conflicts in their usage.

5 Stages of Migrating WordPress Contents into BlogEngine.NET?

Simply say that, transition Between BlogEngine.NET and WordPress is without downtime –

furthermore, a strategic migration steps is enforced to ensure the website visitors do not experience any form of interruptions, i.e. keeping both webpages up and running

1 – Set Up BlogEngine.NET on a subdomain and configure IIS and SQL server;

Why? It is useful for testing environments, blogs, or separate site sections if the need arises.

How do you set up a sub-domain?

  1. Log in to your hosting control panel
  2. Create the subdomain (enter the subdomain name) and choose the main domain
  3. Install or upload a website to the subdomain
  4. Configure SSL (HTTPS) for the Subdomain
  5. Test the created subdomain
2 – Backup and Export Content from WordPress with the following steps
  1. Login to your WordPress Admin Dashboard.
  2. Go to Tools > Export.
  3. Select All Content (includes posts, pages, comments, categories, and tags).
  4. Click Download Export File (this creates an XML file).

When successfully exported, convert the WordPress XML file to BlogEngine.NET format, because BlogEngine.NET do not support direct WordPress import.

BlogEngine.NET format include;

  1. BlogML (.xml)
  2. SQL Database (.bak/.sql)
  3. XML file storage 
3 – Import Data to BlogEngine.NET
  1. Login to BlogEngine.NET Admin Panel.
  2. Go to Settings > Import
  3. But if BlogEngine.NET does not have a direct import tool, manually copy-paste posts into the Admin Panel under New Post.
4 – Transfer Images and Media
  1. WordPress stores images separately in the wp-content/uploads
  2. Manually download these images and upload them to BlogEngine.NET media storage.
  3. Update image URLs in BlogEngine.NET.
5 – Redirect Old URLs

If you are moving from WordPress to BlogEngine.NET but wish to keep the same domain, you can use 301 redirects in your hosting settings to avoid broken links.

6 – Test Your Blog
  1. Review imported posts for formatting errors.
  2. Test internal links to ensure they are working.
  3. Verify the configuration of the SEO settings.

How to Undo the Migration of BlogEngine.NET into WordPress?

Step 1 – Set Up WordPress on a Staging Environment
  • Install WordPress on a temporary domain or subdomain and configure PHP, MySQL, and WordPress plugins.

Step 2 – Export Content from BlogEngine.NET

Locate Settings in Dashboard → Export Blog.

Export all posts, pages, and comments as an XML file and if using an SQL Server database, you may need to manually export using SQL queries.

Step 3 – Import Content (Exported File) into WordPress Platform

Options to Engage;

  1. Use a plugin like WordPress Importer to import the XML file.
  2. After exporting SQL data, use WP All Import or manually migrate the tables.
  3. Verify  and import all posts, pages, and comments.
Step 4 – Redirect Old URLs to WordPress URLs

BlogEngine.NET uses different URL structures than WordPress. It is important you use 301 redirects in web.config (for IIS) or .htaccess (if migrating to Apache).

Step 5 – Final Testing & Domain Switch
  • Test the new WordPress site for functionality, broken links, and design issues.
  • Once verified, update the DNS settings to point your main domain to the new WordPress site.
  • Keep the old BlogEngine.NET site live in a backup state for a short period (just in case).

Remember to create a backup system that will keep the old site up and running in case of eventualities.

Suspended Ceiling: 8 Key Challenges and Solutions in 2025

Originally posted on February 3, 2025 @ 12:53 pm

Ceiling Overview

Ceiling can be made of wood, plaster, stone, concrete and metal which form the overhead structure that encloses a space.

Its purpose can be decorative or and functional that provides insulation, protection, sound control and aesthetic appeal.

As at today, we have seen and used both the traditional ceilings and suspended ceilings.

The origin of the traditional ceiling

The pace at which ceiling was created has its root in architecture for cultural advancement which later ride on the influence of technology.

  1. The early ceilings were natural & wooden, stone & bricks, ornate
  2. The modern ceilings were plaster & stucco, vaulted & coffered, tin & pressed metal

The usage of the Ceilings before Suspended Ceiling

The traditional ceilings were multi-purpose driven. Let’s see some of their purposes and try to relate with what purpose the now suspended ceilings provides.

One of its main purpose is for decorative designs needed in homes, offices, religious buildings and maybe event halls.

Again, the Stone ceilings were tick thereby help to regulate indoor temperatures.

Furthermore, the reinforcement of a building was possible with a protective barrier.

While domes and vaults were specifically designed to amplify sound in large spaces, that is reducing echoes from the sound productions.

Their limitations

Despite the fantastic functions of the traditional ceilings, their limitations that have also created lots of concerns

  1. It was almost impossible to access electrical wires or structural element for repairs, it requires breaking the ceiling.
  2. The solid nature of the ceiling reflected noise that leads to echoing issues
  3. Modification of these categories of ceiling were not feasible
  4. They have less design flexibility that restricted architectural creativeness.

From the above, you can note that it will be costlier retaining the traditional (early and modern) ceilings. Thus, it is now necessary to allow them fade away.

The Origin of Suspended Ceiling

A suspended ceiling is usually installed below the main structural ceiling.

It consists of a lightweight grid framework that holds ceiling tiles or panels made from materials such as metal or PVC, mineral fiber.

The first true suspended ceiling system was introduced, designed to conceal pipes, wiring, and ductwork while improving acoustics by Donald Brown’s Patent in 1919.

While between 1950s-1960s the system evolved with lightweight acoustic tiles and metal grids, becoming popular.

And Today, the finest part of suspended ceilings is that it incorporates fire-resistant, soundproof, and eco-friendly materials, along with integrated lighting and HVAC systems.

The beauty it can create for your space –  

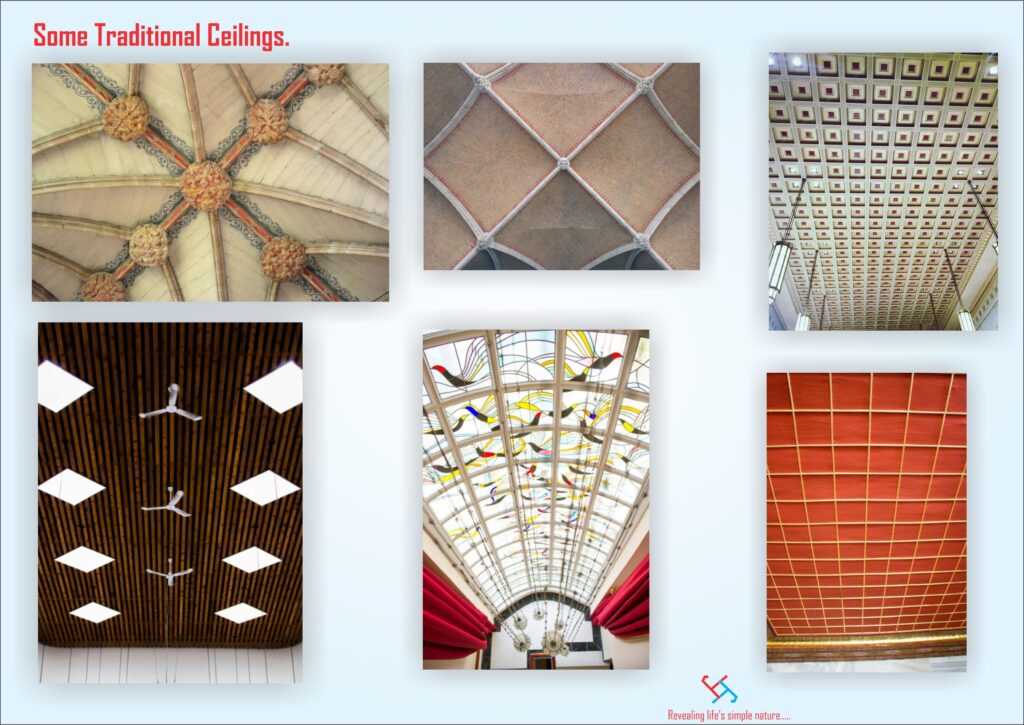
Traditional ceilings samples

Some Ceilings in the early stage of ceiling

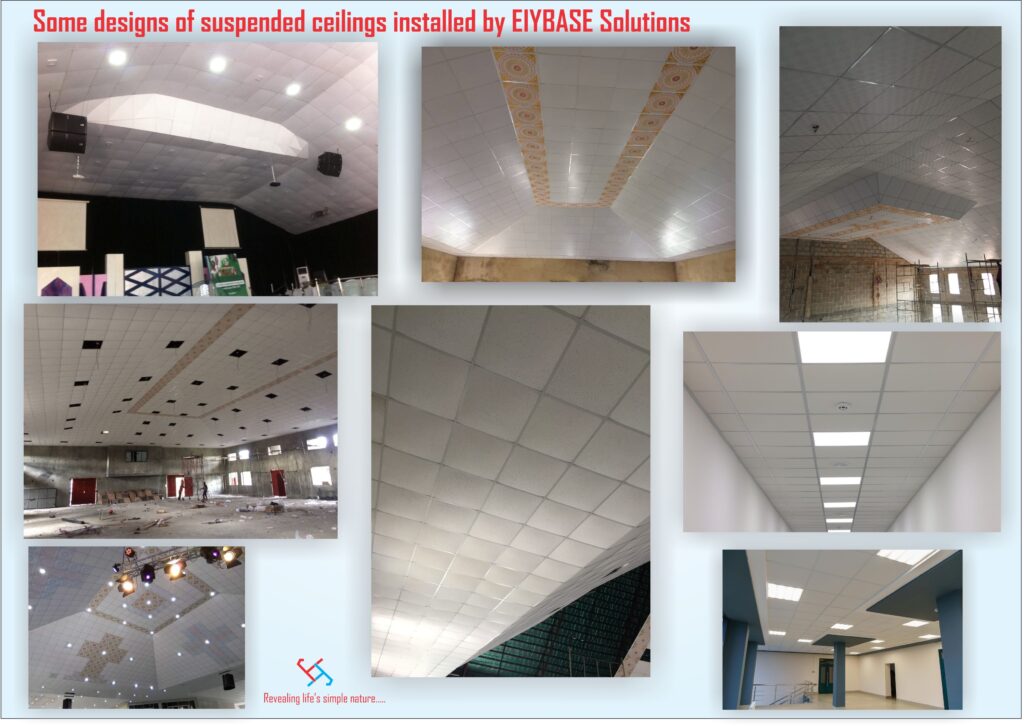
Suspended Ceiling Samples

The beauty is reflected from its desings

Reasons why you should be desiring Suspended Ceiling

There are several reasons why you might desire a suspended ceiling,

  1. It enhances the overlook of a space and also provides a uniform and professional appearance (creative and modern designs).
  2. It’s easy access for maintenance or repairs is unbeatable with assurance of not damaging the ceiling tiles.
  3. It has become ideal for any structural building by reducing noise levels and absorbing sound
  4. Energy efficiency is possible by allowing integrated LED lighting systems.
  5. The spread of fire can be minimized when there is fire outbreak, because it is fire resistant.
  6. Modification or replacement of ceiling panel and tiles is guaranteed with reduced maintenance cost.
  7. Invention of suspended ceilings provided modern solutions such as better acoustics.
  8. Suspended ceiling reduces glare and creates a warm, inviting atmosphere.
  1. It can be adjusted and re-adjusted to different ceiling heights for a more spacious look as desired.

Some structural areas you can install suspended ceilings and what to expect.

Suspended ceilings are widely used in various settings not limited to the following listed below;

Commercial (offices, malls, hotels) – For aesthetics, acoustics, and hiding infrastructure.

Institutions (Educational, Religious) – Helps with sound absorption and lighting integration.

Healthcare (hospitals, clinics) – Provides easy access to essential utilities and enhances hygiene.

Industrial– Helps with fire safety and insulation.

Residential– Used in basements, kitchens, or living areas for decoration and insulation.

Let’s Consider some of the challenges associated with Suspended Ceiling

First, the regular materials used in the installation of suspended ceiling are;

  1. Mineral fiber (for sound absorption)
  2. Metal (for durability and aesthetics)
  3. PVC or plastic (for moisture resistance)
  4. Gypsum (for fire resistance)

 The Basic steps of how suspended ceiling is installed

  1. Grid Framework Installation – A metal grid system is created and suspended from the original ceiling using wires.
  2. Panel Placement – Ceiling tiles or panels are placed within the grid framework.
  3. Additional Fixtures – Lighting, ventilation, and other utilities are integrated into the system.

As modern suspended ceilings became popular in the 20th century based on its unique nature, particularly in commercial and office buildings, the following challenges were discovered in the process of installing, its usage and maintenance of the ceiling tiles.

  1. A suspended Ceiling needs at least 3 – 6 inches of clearance below the initial ceiling. If the original ceiling already low, adding a drop ceiling may make the space feel cramped or less open.
  2. fire suppression systems that is not well integrated may be obstructing safety features
  3. When the existing ceiling structure is not supporting the suspended ceiling grids and panels, there is going to be limitation that can be dangerous
  4. The risk of having heavy materials on the suspended ceiling which has load bearing limit
  5. Violation of building codes and ventilation for maintenance, suspended ceiling materials not meeting safety regulations (fire hazards, structural failures, health concerns, and legal liabilities)
  6. Maintenance of conceal utilities like wiring, pipes or other infrastructure can be difficult when there is no adequate space for movement between the initial ceiling roof and suspended ceiling.
  7. With suspended ceiling in a smaller space, the visual impact of a lowered ceiling will make the room more constrained although not same with larger space.
  8. Noise transmission issue that passes through suspended ceiling because of lack of sound insulation, plenum, Flanking Paths, hard surface ceiling tiles etc.

Solutions to the above challenges

 Please note that the suggestion solutions are itemized according to the numbering on the challenges.

  1. Rectify the height of the hall – A shallow drop ceiling, semi exposed grid system can adjust the height of the suspended ceiling grid which will help to create a more open feel, especially in smaller spaces.
  2. Use fire resistance ceiling tiles were applicable e.g. Laminated Gypsum, Mineral fiber, metal acoustic panels, etc. These are fire-rated, non-toxic and a moisture resistant ceiling material
  3. Choose drop-out panels or modular systems for easy access
  4. Choose a heavy-duty grid system designed to support additional load and follow proper installation guidelines to prevent collapse and structural issues
  5. Ensure ceiling tiles meet ASTM (American Society for Testing and Materials), UL (Underwriters Laboratories), and local building codes
  6. Maintenance; lighting fixtures, air vents, sprinklers, and wiring should be considered
  7. Lightning placement and choose removable tiles. The use of decorative ceiling tiles, metal grids, or custom panels to enhance visual appeal.
  8. Soundproofing – Amongst others, choose high Noise Reduction Coefficient and tight-fitting tiles to absorb sound and reduce echo. It will prevent sound leakage.

You can consider getting more detail about a previously published article on the lasting benefits of installing suspended ceiling for sound production.